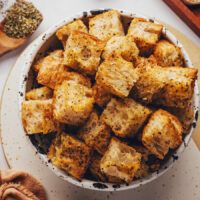
Who could say no to toasty and savory little bites of bread!? Not us. Flavorful, crunchy croutons are always a welcome addition to soups and salads, and they also happen to be SO quick and easy to make at home!
Once you give these homemade croutons a taste, we’re sure you’ll be putting them on everything, or just eating them right off the baking sheet. Let us show you how it’s done!
How to Make Croutons
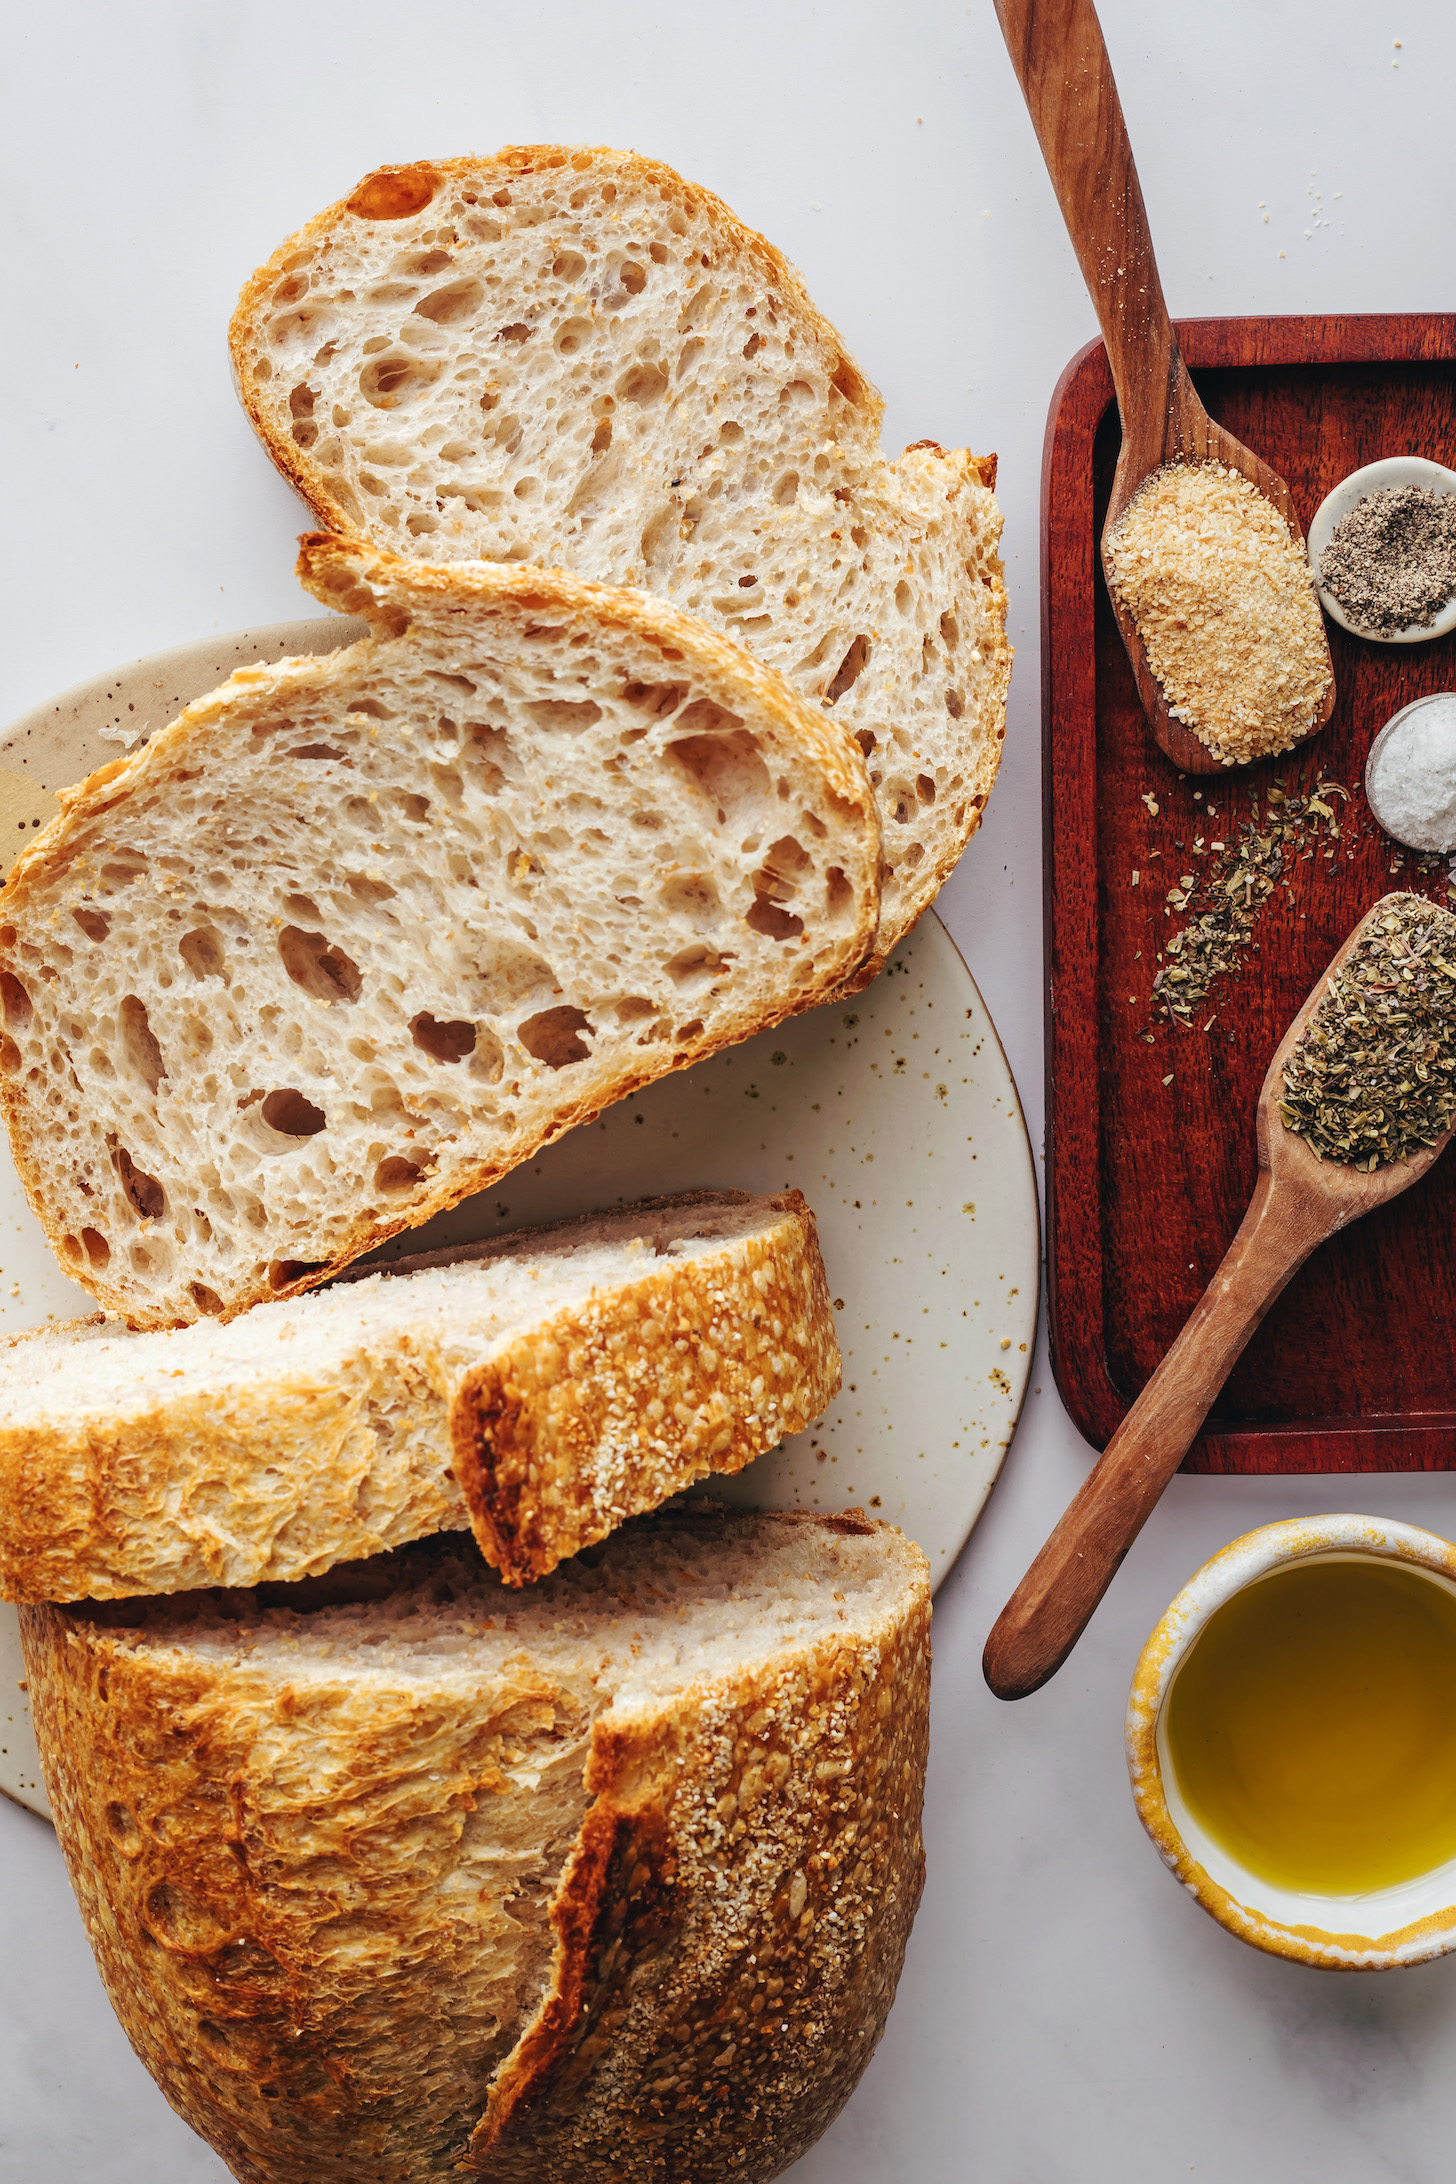
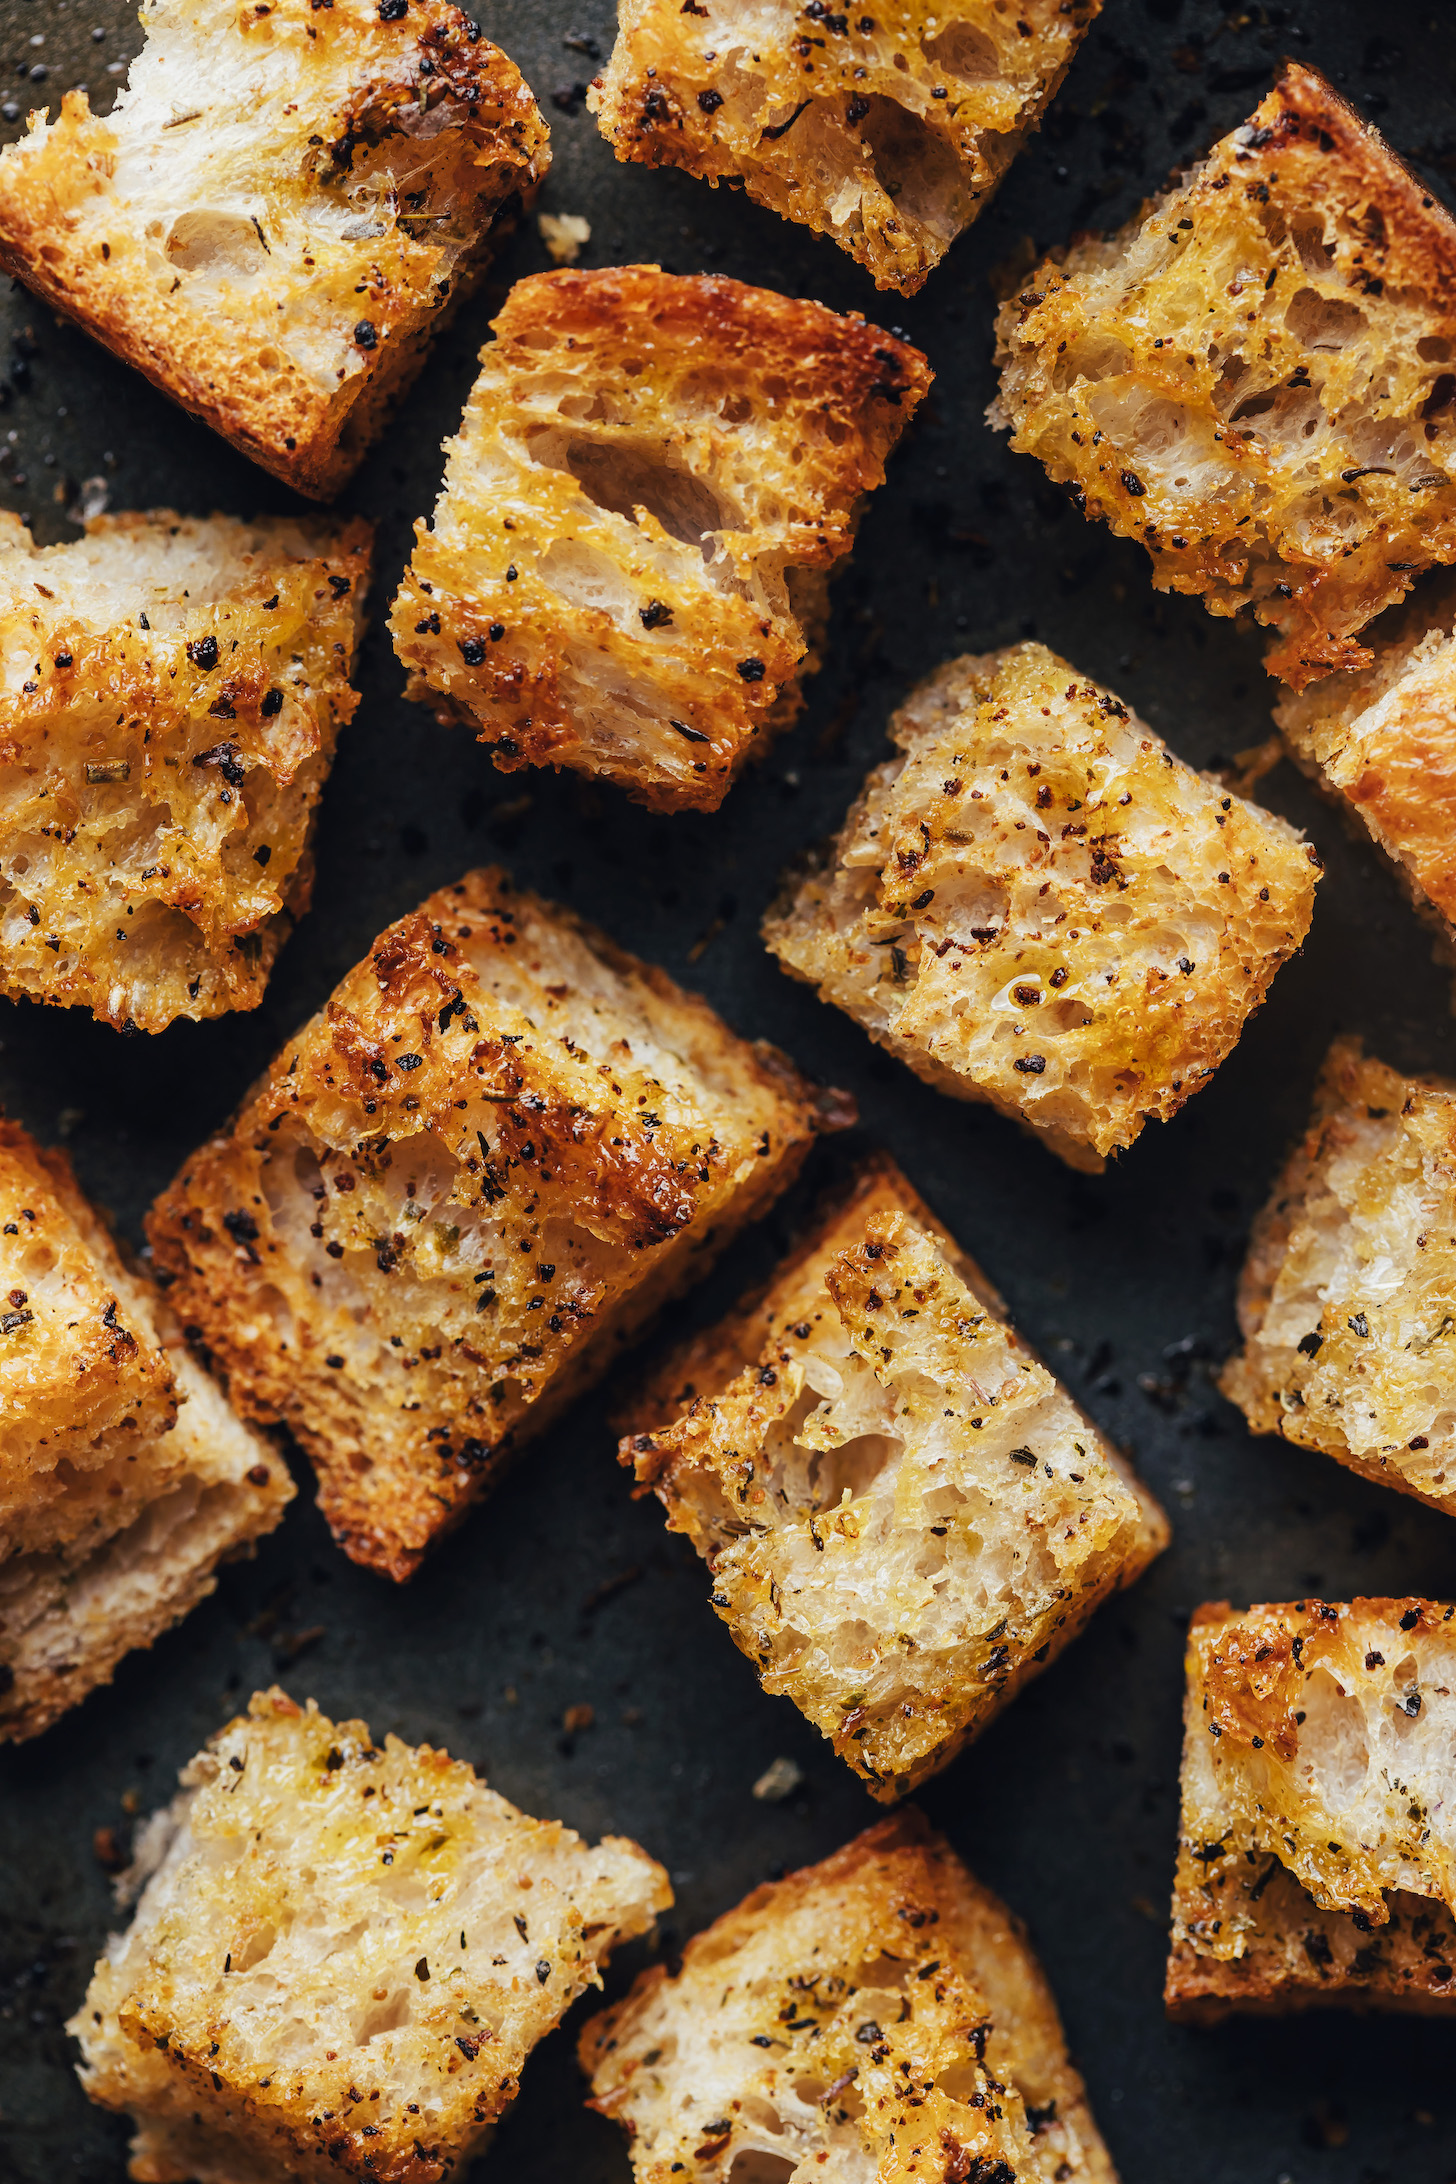
The first step is to choose your bread. Any type of savory bread will work, including sourdough, sandwich bread, and gluten-free, too! We tested all three and found sourdough had the best texture and flavor and sandwich bread created the most classic “crunchy” croutons.
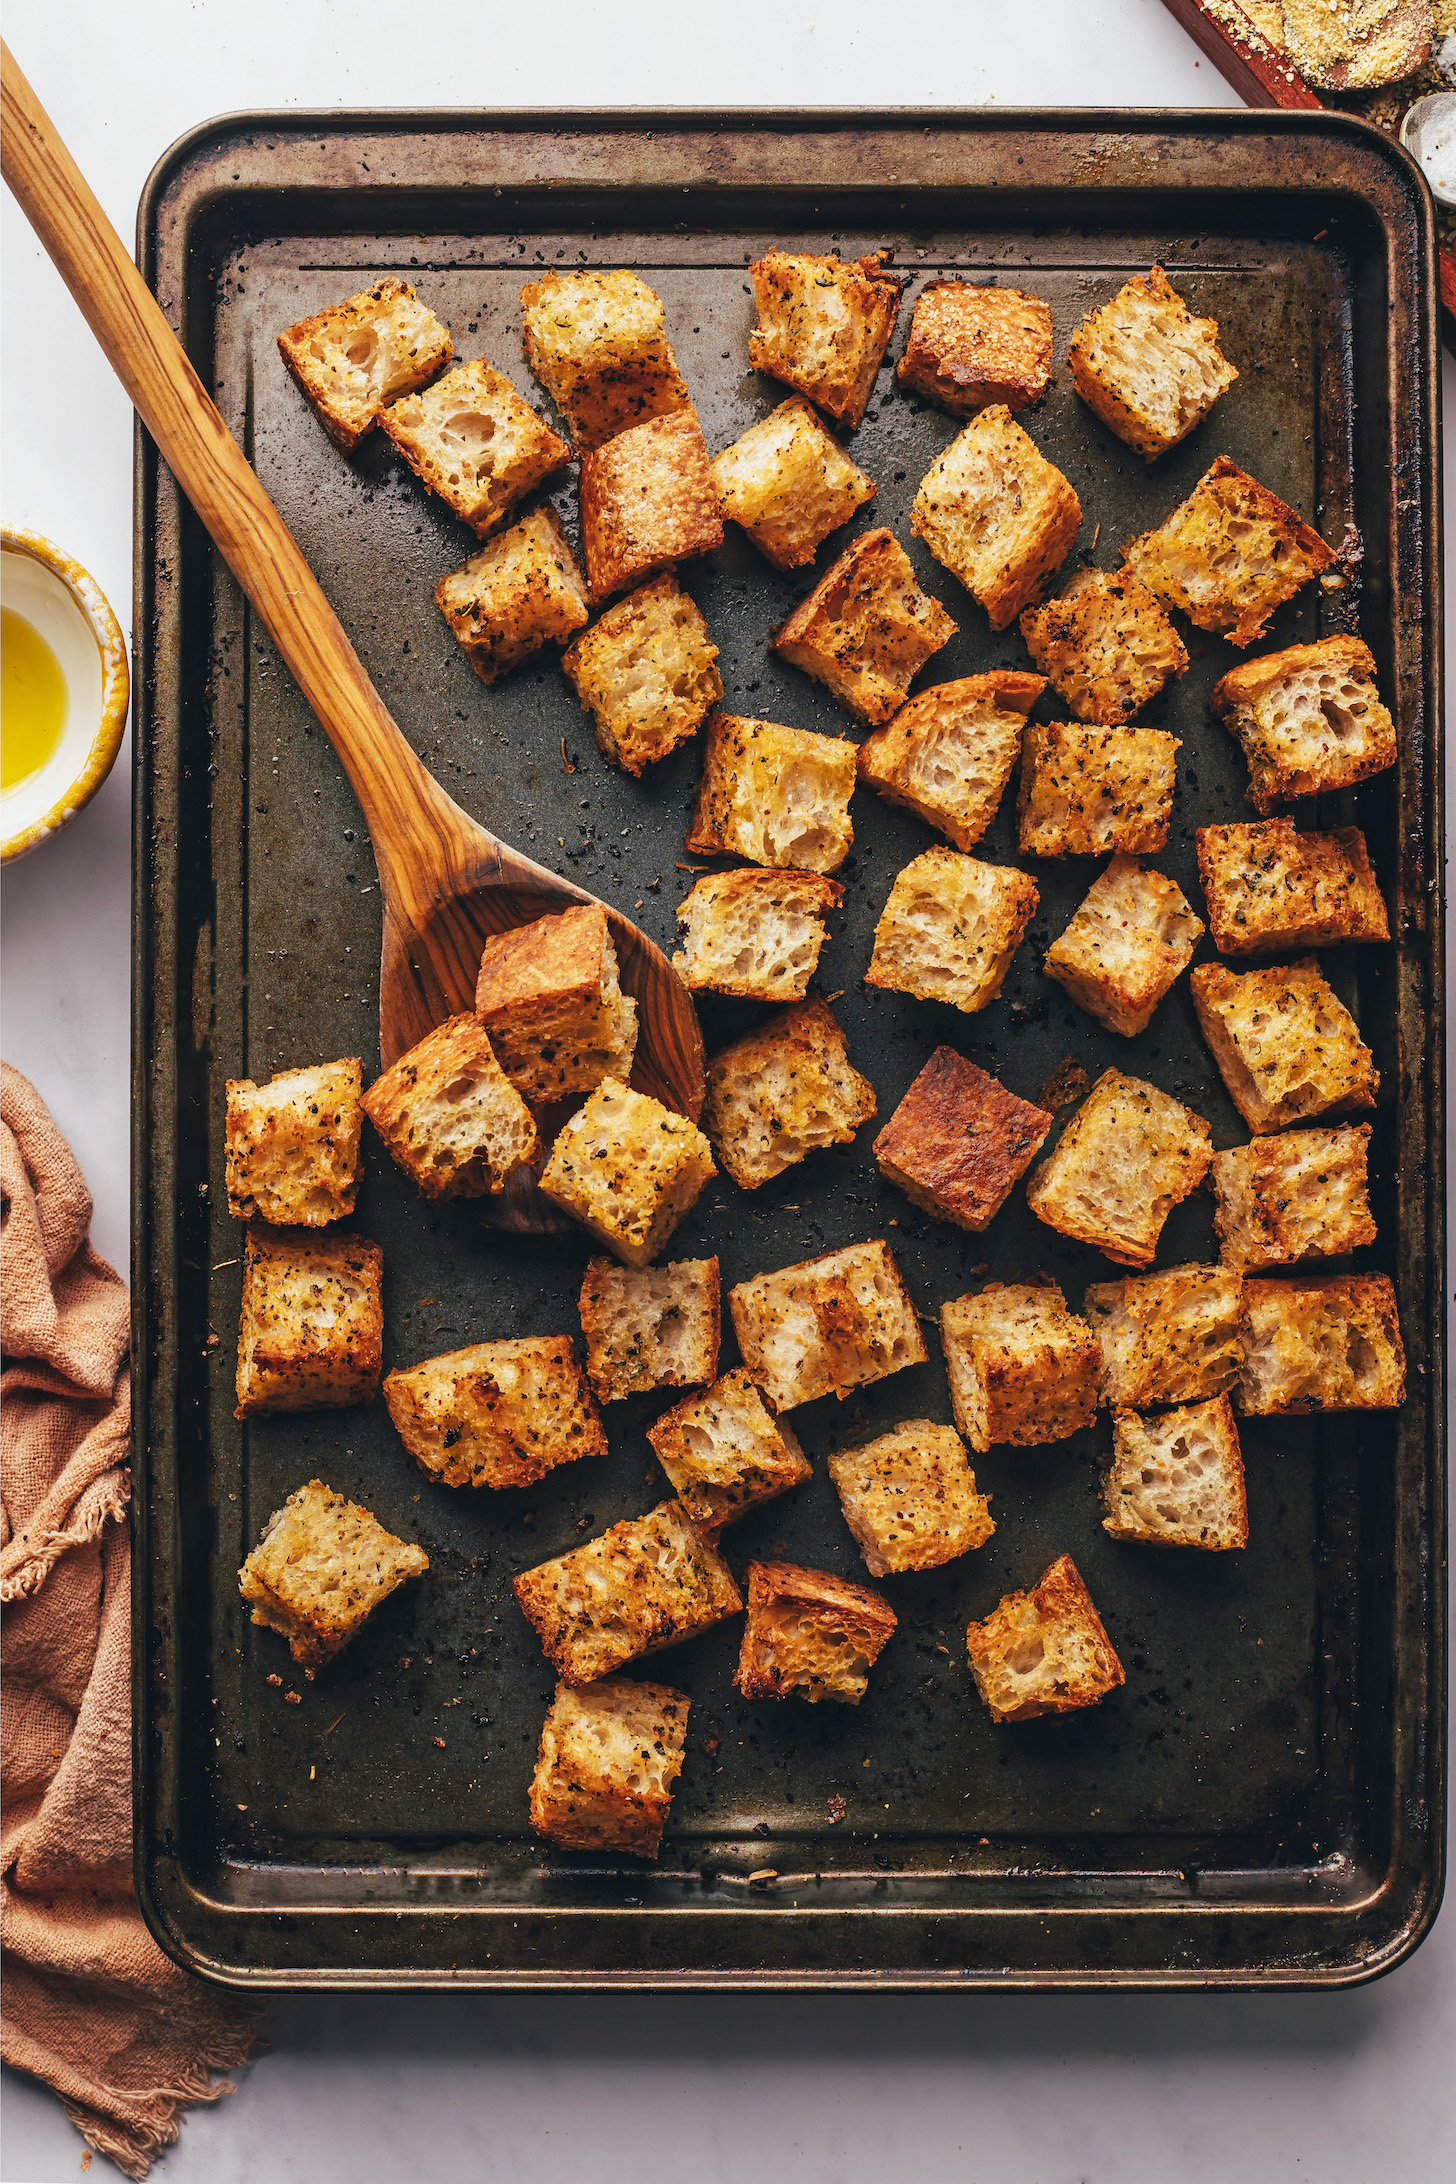
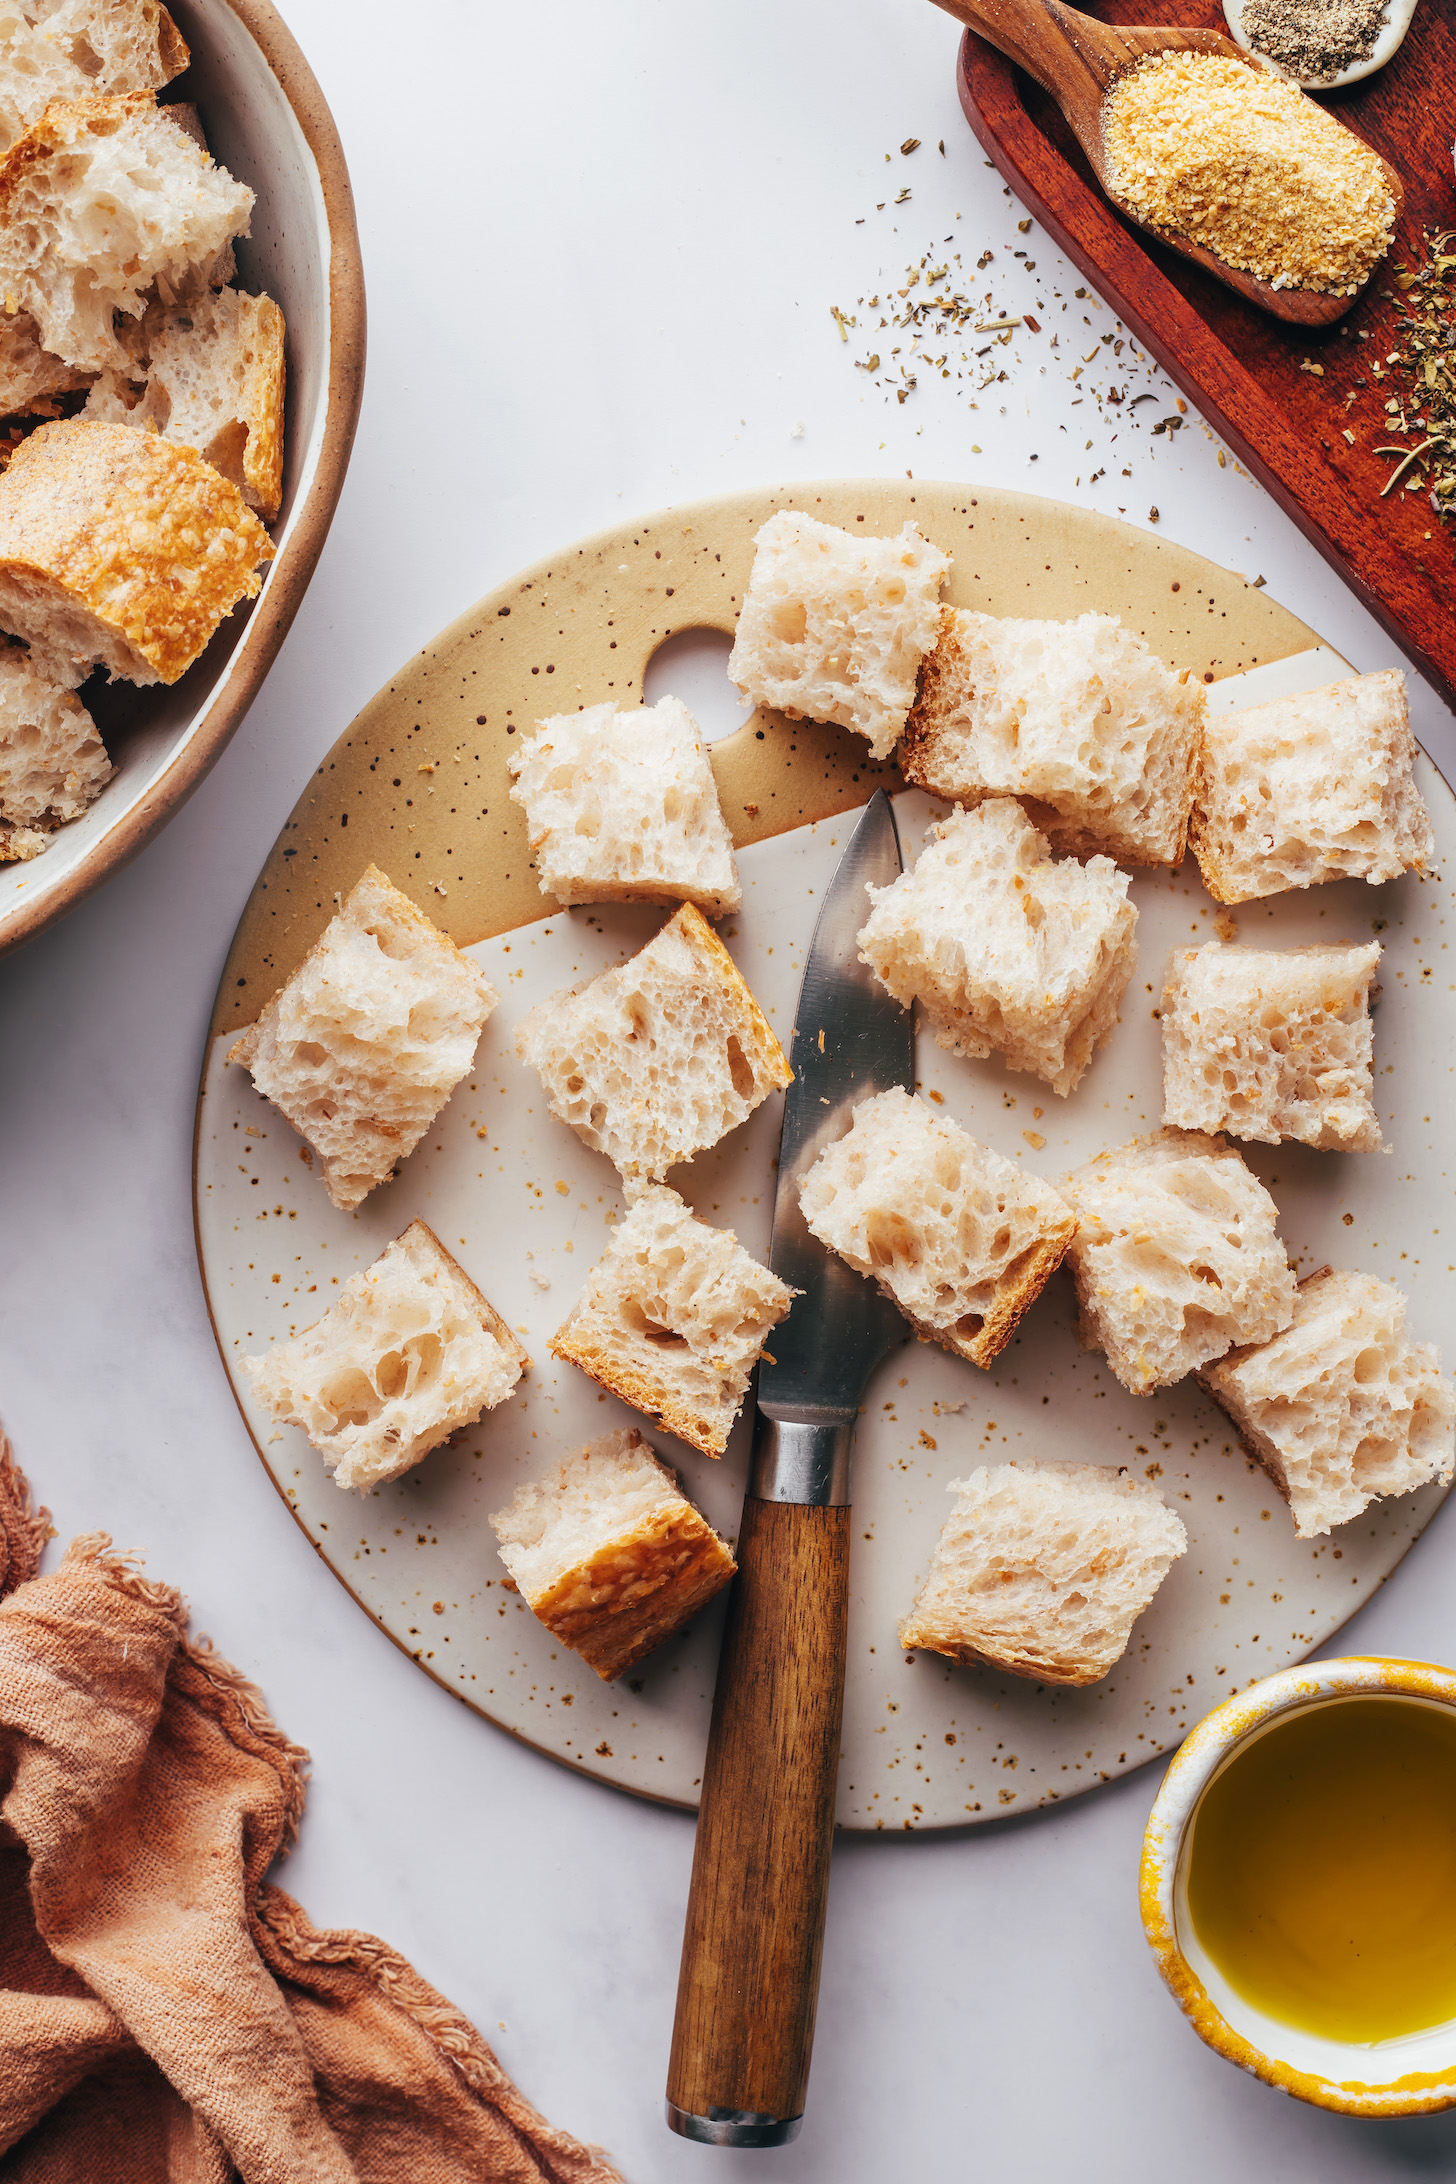
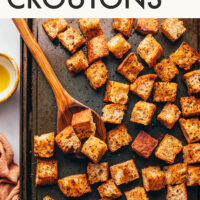
To begin, cut the bread into cubes, creating maximum surface area for crispiness and flavor.
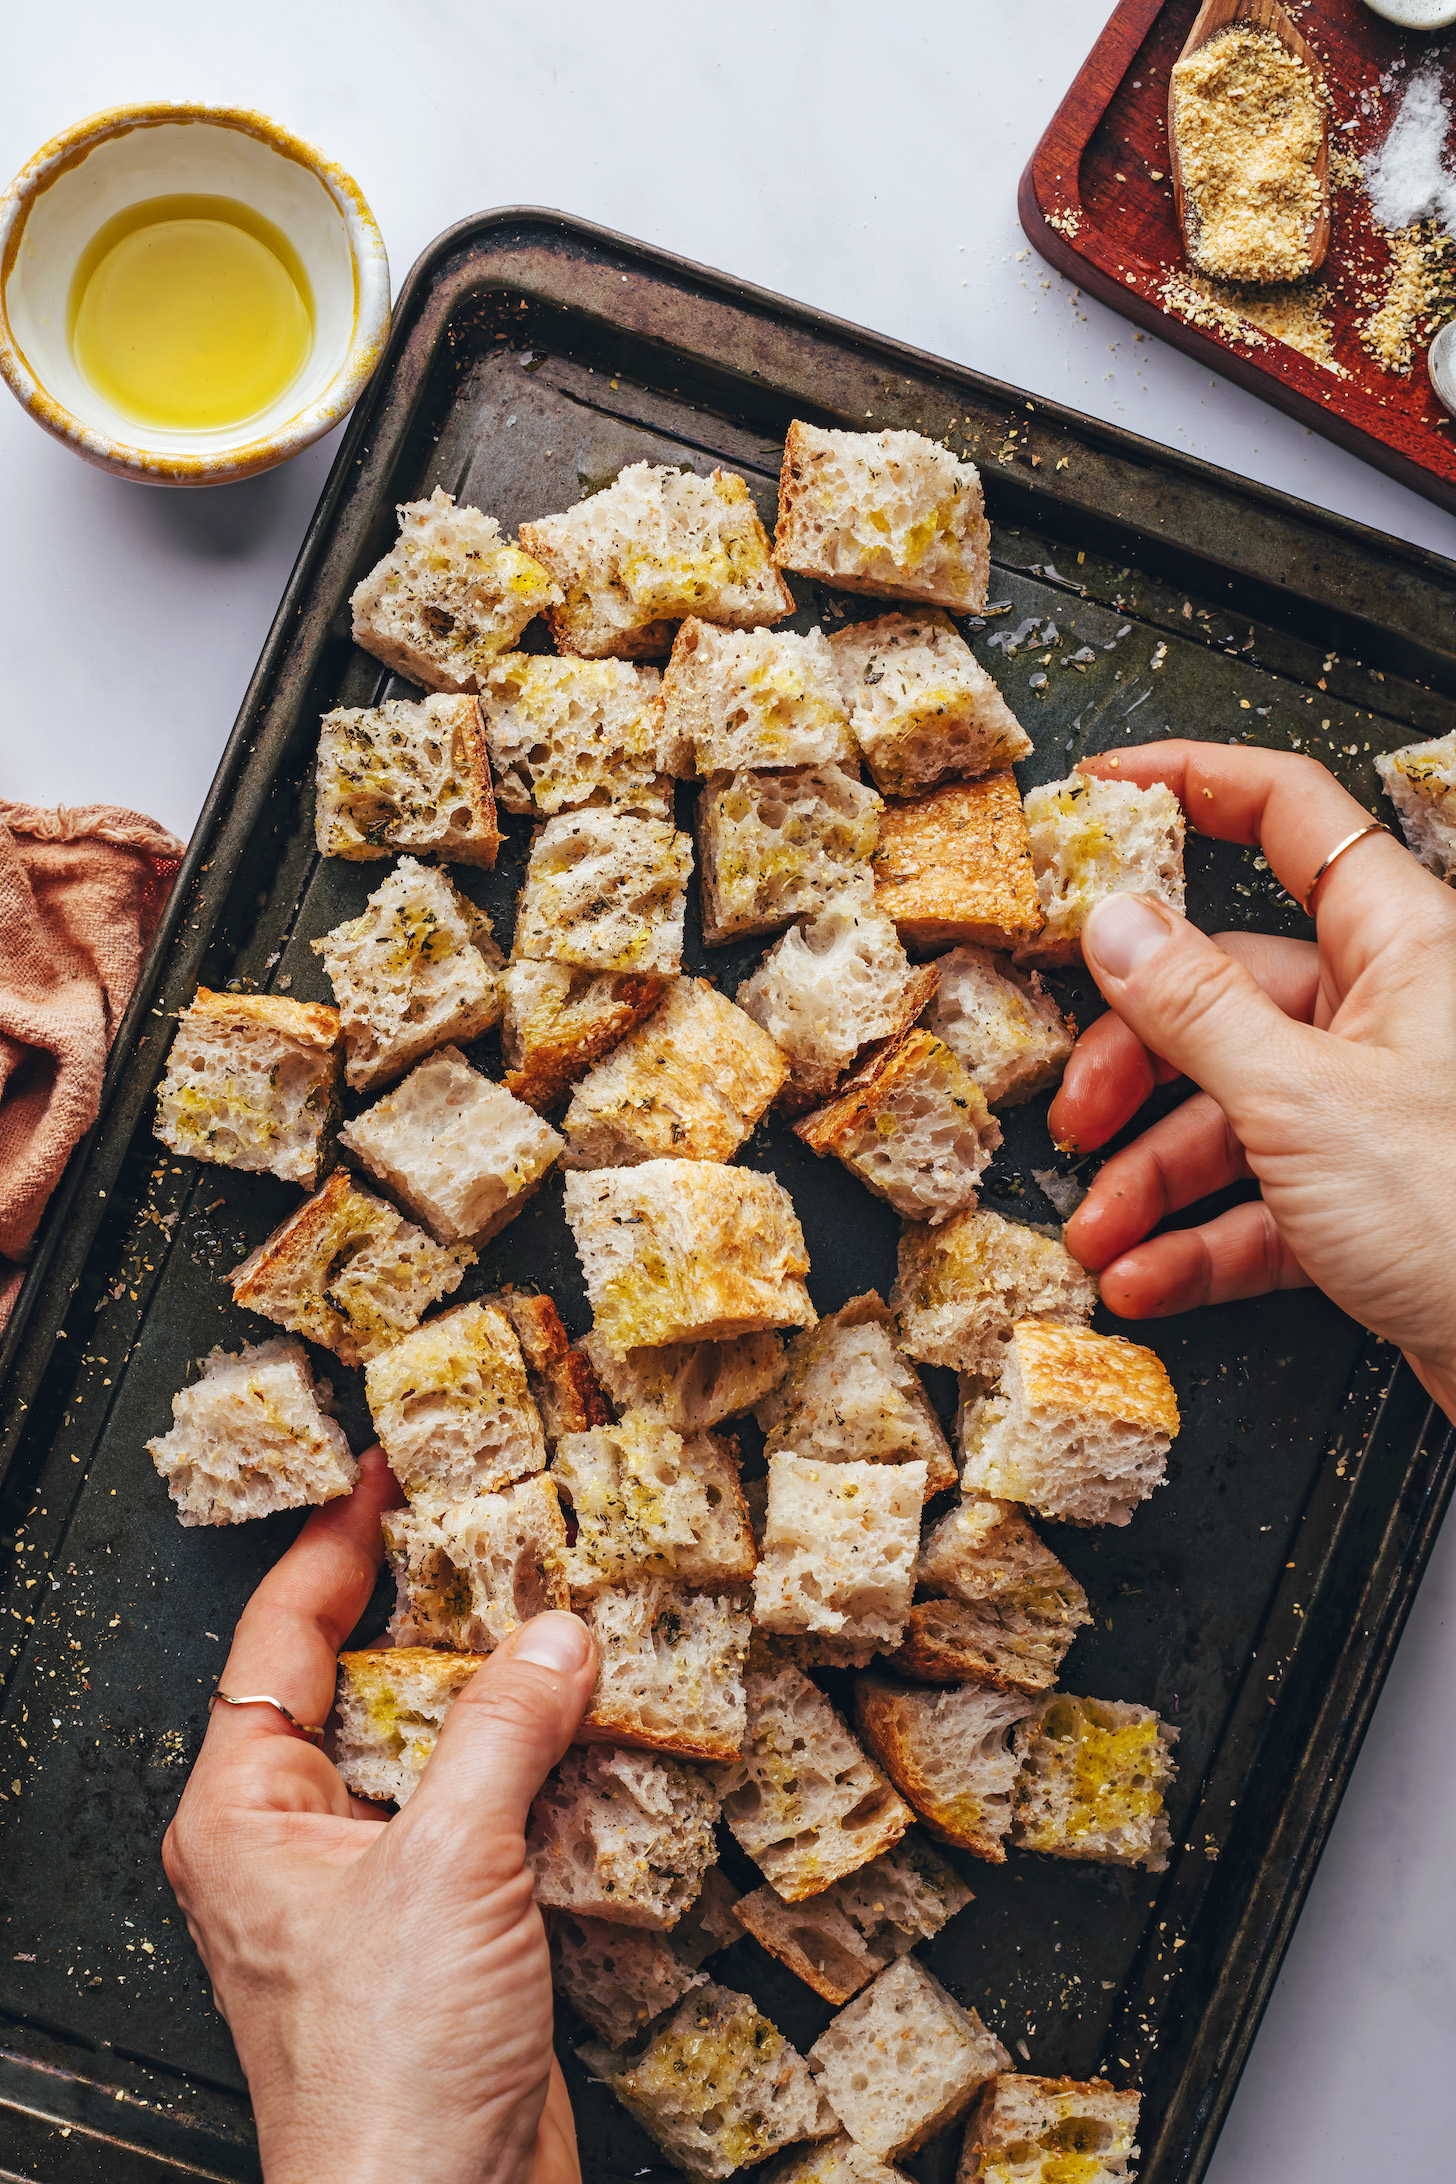
Then toss the bread with your choice of oil (avocado or olive oil). While avocado oil produces a more neutral flavor, you can’t go wrong with either one!
For a classic crouton taste, season the cubed bread with salt and pepper, plus garlic powder and dried Italian herbs (basil + oregano). You can also play around with the spices so they go with a specific dish you’re making!
After baking for a quick 8-12 minutes at 400 degrees Fahrenheit, crispy, golden brown croutons await!
We hope you LOVE these garlicky homemade croutons! They’re:
Crunchy
Savory
Versatile
Classic
Quick & easy
& SO much better than store-bought!
Enjoy them on soups and salads, including our Easy 1-Pot Tomato Soup (Vegan), Rosemary Roasted Root Vegetable Panzanella, Creamy Chipotle Tomato Soup (1 Pot!), and Heirloom Tomato Panzanella Salad.
Love Bread? Try These Next:
- The Easiest Whole Grain Seeded Bread
- The Best Gluten-Free Bread (No-Knead!)
- 7-Ingredient Muesli Bread
- Gluten-Free Flatbread (1 Bowl, 20 Minutes!)
If you try this recipe, let us know! Leave a comment, rate it, and don’t forget to tag a photo @minimalistbaker on Instagram. Cheers, friends!

Garlicky Homemade Croutons
Ingredients
- 6 cups bread of choice*, cut into 1-inch (2 ½ cm) cubes (8 slices standard-size sandwich bread or 4-5 slices of larger bread like sourdough yield ~6 cups or 250 g)
- 1/4 cup avocado oil (or sub olive oil)
- 3/4 tsp each sea salt and black pepper
- 1 tsp garlic powder
- 1 tsp Italian herb seasoning (dried basil + oregano // optional)
Instructions
- Preheat oven to 400 degrees F (204 C).
- Add all ingredients to a baking sheet and toss with clean hands to evenly coat. Bake for 8-12 minutes (8 for softer croutons, 12 for crunchier), or until slightly golden and firm to the touch. We baked ours for 10 minutes.
Video
Notes
*Nutrition information is a rough estimate calculated with sourdough bread.


Rachel says
So I had made homemade bread with too much salt accidentally, had no idea what to use salty bread for until finding this recipe!!!! For this crouton recipe I just omitted the addition of salt to the croutons, and they turned out delicious and the perfect add-on to my salad!!!! I was so worried I’d have to waste bread but this recipe came in clutch!! 10/10 and my toddlers love it!!! I cut my croutons thick and baked 12 minutes!
Great idea to make it into croutons, Rachel! We’re so glad it was a success! xo
Kimberley Snyder says
I made these with a loaf of sourdough sandwich bread that didn’t rise very much. The bread was kind of dense so I thought it would make great croutons. I came across this recipe and you had me at “garlicky”! These are so delicious. I give them five stars. Thank you so much!
Yay! We’re so glad you enjoyed the croutons, Kimberley. Thank you for the lovely review! xo
MAM says
Could access croutons be vacuum sealed and frozen for use later?
We haven’t tested that, but we think it would work!
Nicole says
We made these for the Creamy Tuscan White Bean soup and they were a lovely addition! I didn’t have Italian seasoning on hand but had poultry seasoning (for stuffing) which is probably pretty similar, so I used that. These were so easy but felt so fancy! They really elevated the soup (which was already great on it’s own). Thank you!
Yay! We’re so glad you made the croutons, Nicole. They really do take the soup to the next level! Thank you for sharing! xo
Lillian says
Any suggestions for making these oil free? What if I tossed with aquafaba and the spices? Or would it be better to just spray with water?
Hmm, we don’t think they would crisp up without oil, unfortunately! Aquafaba might turn out okay though. Let us know if you try it!
Stacy says
Adding to the list of “will never buy store-bought again.”
I’ve been making sourdough 1-2x/week, and the last third of the loaf is a bit tough to get through – I used it to make these croutons this morning, and they are amazing. I used Herbs de Provence, as I just need to get rid of that little cache I’ve had for I-don’t-want-to-say-how-long. I might cut the garlic and salt down a bit next time – as written is delicious, but I feel like it could go a touch lighter.
Bonus: we are making MB aioli, so we roasted the garlic at the same time these were toasting. Whole house smells like garlic heaven.
Whoop! We’re so glad you’re enjoying both recipes, Stacy. Thank you for sharing! xo
Bee says
Super easy to do. I followed the advice of another user and used ciabatta bread and used nutritional yeast with the plastic bag to shake it all up. Mess free and taste better than store bought.
We’re so glad you enjoyed them, Bee! Thanks so much for sharing! xo
Christine says
I made these croutons (along with the creamy Tuscan white bean and kale soup- delish!) with sourdough bread (as suggested) exactly as it’s written, it was a hit for my entire family! Love this finishing homemade-touch!
Woohoo! Thanks so much for two lovely reviews, Christine. We’re so glad you all enjoyed these recipes!
Kelly Davis says
I’ve made these several times and they’re always so good and the variations are endless. For My latest batch, I used ciabatta bread and sunflower oil. I added a good pinch of nutritional yeast to the dry ingredients for a cheesy element, and then whisked the dry ingredients into the oil before coating the bread. To coat, I find it easier to place the bread cubes into a zipper bag, pour the oil/herb mixture in, and gently shake. Dump everything onto a cookie sheet, and bake!
Ooo love that! Sounds delish. Thanks so much for the great review, Kelly!
Penny says
Very good but a little too salty. Next time I’m going to use just a 1/2 tsp of salt and pepper (used only a half tsp of pepper this time and it was plenty).
Lovely! Thanks so much for sharing, Penny!
Kim says
Thank you for the recipe. I love croutons. I think I will have to give sourdough a try. Looks sooooo goood!!!!
Yay! Let us know how they turn out, Kim! xo